2. Create a Zero-OS Bootstrap Image
Introduction
We will now learn how to create a Zero-OS bootstrap image in order to boot a DIY 3Node.
If you are building an HDD-only node, read this section too.
Download the Zero-OS Bootstrap Image
Let's download the Zero-OS bootstrap image via the Zero-OS Boot Generator: https://v3.bootstrap.grid.tf

On the Boot Generator page, write your farm ID and choose Production mode to deploy on mainnet.
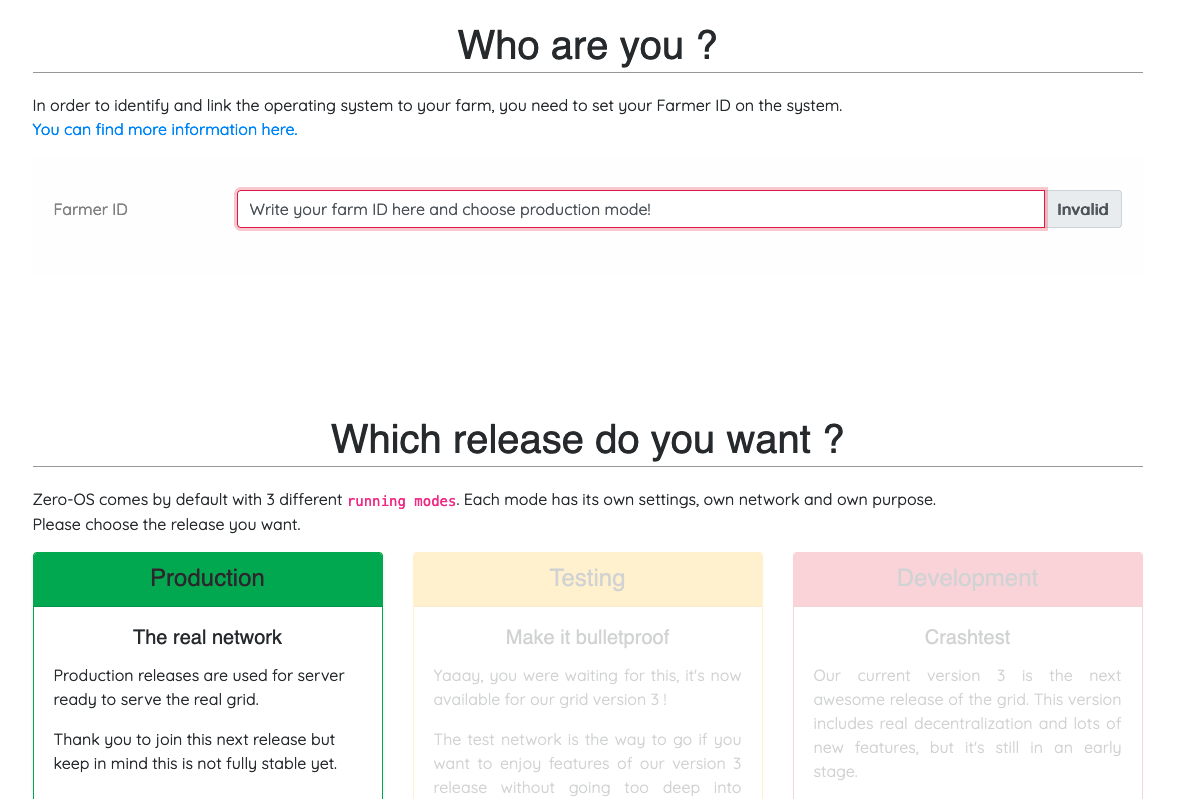
Choose a bootstrap image format to download.
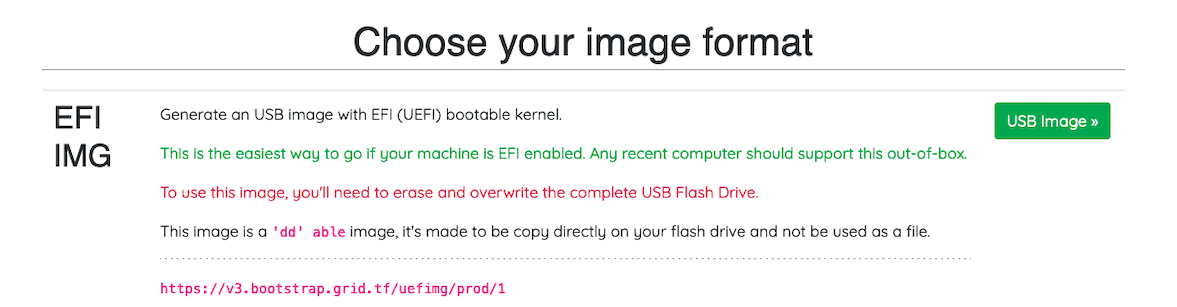
If your system is new, choose an image format for a UEFI bootable kernel. You can use either EFI IMG or EFI FILE.
EFI IMG- Burn this image with BalenaEtcher. See below for more info.
EFI FILE- Format the USB to one
FATpartition and save the bootstrap image as/EFI/BOOT/BOOTX64.EFI.
- Format the USB to one
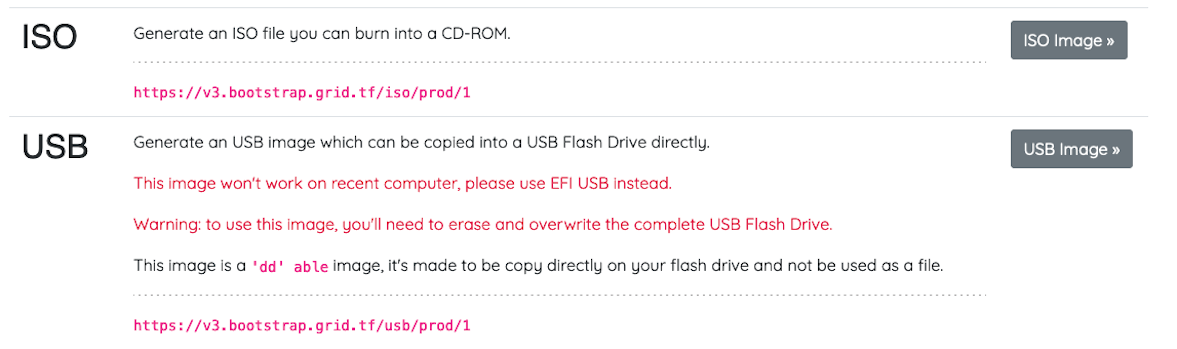
For older systems, choose an image format for a BIOS bootable kernel.
- For BIOS CD/DVD, choose ISO.
- For BIOS USB, choose USB.
Next, we cover in details how to burn the bootstrap image.
Burn the Zero-OS Bootstrap Image
We show how to burn the Zero-OS bootstrap image. A quick and modern way is to burn the bootstrap image on a USB key.
CD/DVD BIOS
For the BIOS ISO image, download the file and burn it on a DVD.
USB Key BIOS+UEFI
There are many ways to burn the bootstrap image on a USB key. The easiest way that works for all operating systems is to use BalenaEtcher. We also provide other methods.
BalenaEtcher (MAC, Linux, Windows)
For MAC, Linux and Windows, you can use BalenaEtcher to flash the image on a USB key. This program also formats the USB in the process. This will work for the option EFI IMG for UEFI boot, and with the option USB for BIOS boot. Simply follow the steps presented to you and make sure you select the bootstrap image file you downloaded previously.
Note: There are alternatives to BalenaEtcher (e.g. usbimager for Windows, MAC and Linux, and Rufus for Windows).
General Steps with BalenaEtcher:
- Download BalenaEtcher
- Open BalenaEtcher
- Select Flash from file
- Find and select the bootstrap image (with your correct farm ID)
- Select Target (your USB key)
- Select Flash
That's it. Now you have a bootstrap image on Zero-OS as a bootable removable media device.
CLI (Linux)
For the BIOS USB and the UEFI EFI IMG images, you can do the following on Linux:
sudo dd status=progress if=FILELOCATION.ISO(or .IMG) of=/dev/sdX
Simply replace X by the proper disk for your USB key. To see your disks, write lsblk in the command line. Make sure you select the proper disk!
If you USB key is not new, make sure to format it before burning the Zero-OS image.
Additional Information (Optional)
We cover some additional information. Note that the following information is not needed for a basic farm setup.
Expert Mode
You can use the expert mode to generate specific Zero-OS bootstrap images.
Along the basic options of the normal bootstrap mode, the expert mode allows farmers to add extra kernel arguments and decide which kernel to use from a vast list of Zero-OS kernels.
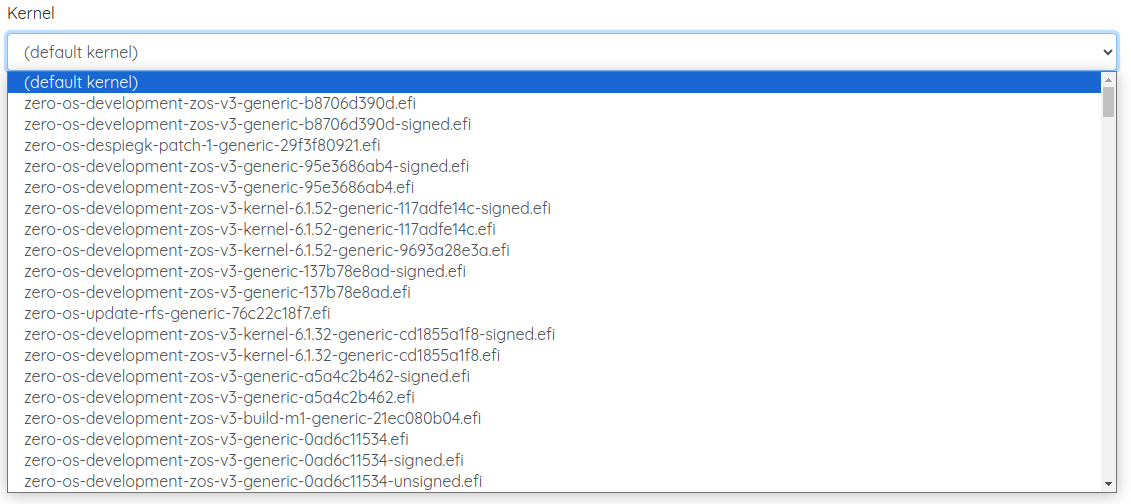
Use a Specific Kernel
You can use the expert mode to choose a specific kernel. Simply set the information you normally use and then select the proper kernel you need in the Kernel drop-down list.
Disable GPU
You can use the expert mode to disable GPU on your 3Node.

In the expert mode of the Zero-OS Bootstrap generator, fill in the following information:
- Farmer ID
- Your current farm ID
- Network
- The network of your farm
- Extra kernel arguments
-
disable-gpu
-
- Kernel
- Leave the default kernel
- Format
- Choose a bootstrap image format
- Click on Generate
- Click on Download
Bootstrap Image URL
In both normal and expert mode, you can use the generated URL to quickly download a Zero-OS bootstrap image based on your farm specific setup.
Using URLs can be a very quick and efficient way to create new bootstrap images once your familiar with the Zero-OS bootstrap URL template and some potential varations.
https://<grid_version>.bootstrap.grid.tf/<image_format>/<network>/<farm_ID>/<arg1>/<arg2>/.../<kernel>
Note that the arguments and the kernel are optional.
The following content will provide some examples.
Zeros-OS Bootstrapping
On the main page, once you've written your farm ID and selected a network, you can copy the generated URL of any given image format.
For example, the following URL is a download link to an EFI IMG of the Zero-OS bootstrap image of farm 1 on the main TFGrid v3 network:
https://v3.bootstrap.grid.tf/uefimg/prod/1
Zeros-OS Expert Bootstrap
You can use the generated sublink at the Generate step of the expert mode to get a quick URL to download your bootstrap image.
- After setting the parameters and arguments, click on Generate
- Add the Target content to the following URL
https://v3.bootstrap.grid.tf- For example, the following URL sets an ipxe script of the Zero-OS bootstrap of farm 1 on the main TFGrid v3 network, with the disable-gpu function enabled as an extra kernel argument and a specific kernel:
-
https://v3.bootstrap.grid.tf/ipxe/test/1/disable-gpu/zero-os-development-zos-v3-generic-b8706d390d.efi
-
- For example, the following URL sets an ipxe script of the Zero-OS bootstrap of farm 1 on the main TFGrid v3 network, with the disable-gpu function enabled as an extra kernel argument and a specific kernel: