Umbrel
Introduction
Umbrel is an OS for running a personal server in your home. Self-host open source apps like Nextcloud, Bitcoin node, and more.
Prerequisites
- Make sure you have a wallet
- From the sidebar click on Applications
- Click on Umbrel
Process :
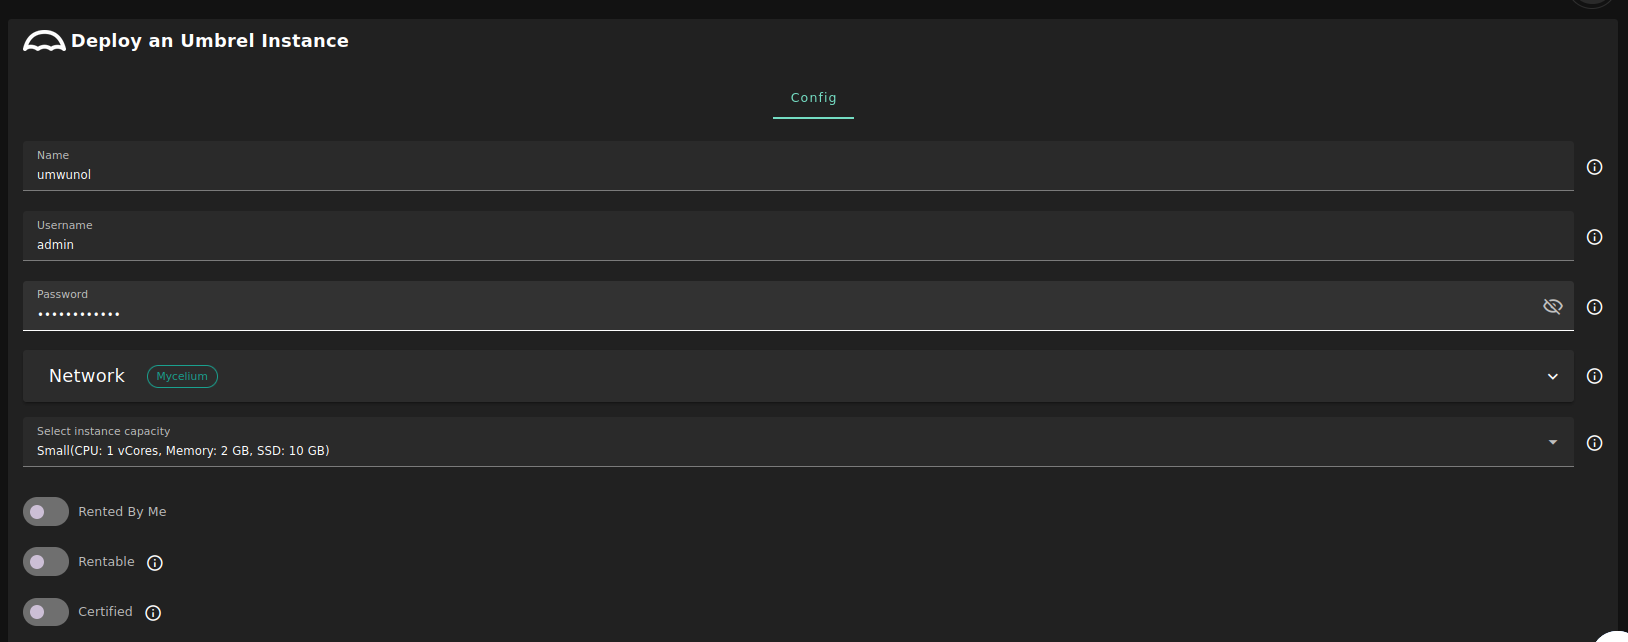
- Enter an instance name.
- Enter a Username
- will be used to create Umbrel dashboard account.
- Enter a Password
- Will be used to login to the Umbrel dashboard.
- Must be 12 to 30 characters .
- Select a capacity package:
- Small: { cpu: 1, memory: 2, diskSize: 10 }
- Medium: { cpu: 2, memory: 4 , diskSize: 50 }
- Large: { cpu: 4, memory: 16 , diskSize: 100 }
- Or choose a Custom plan
- Choose the network
Public IPv4flag gives the virtual machine a Public IPv4Planetary Networkto connect the Virtual Machine to Planetary networkMyceliumto enable Mycelium on the virtual machineWireguard Accessto add a wireguard access to the Virtual Machine
Rented By Meflag to retrieve nodes currently reserved by youRentableflag to retrieve nodes that can be reserved as dedicated nodesCertifiedflag to retrieve only certified nodes- Choose the location of the node
RegionCountryFarm Name
- Choose the node to deploy the Umbrel instance on
Or you can select a specific node with manual selection.
After Deploying:
You can see a list of all of your deployed instances

-
You can click on
Show detailsfor more details about the Umbrel deployment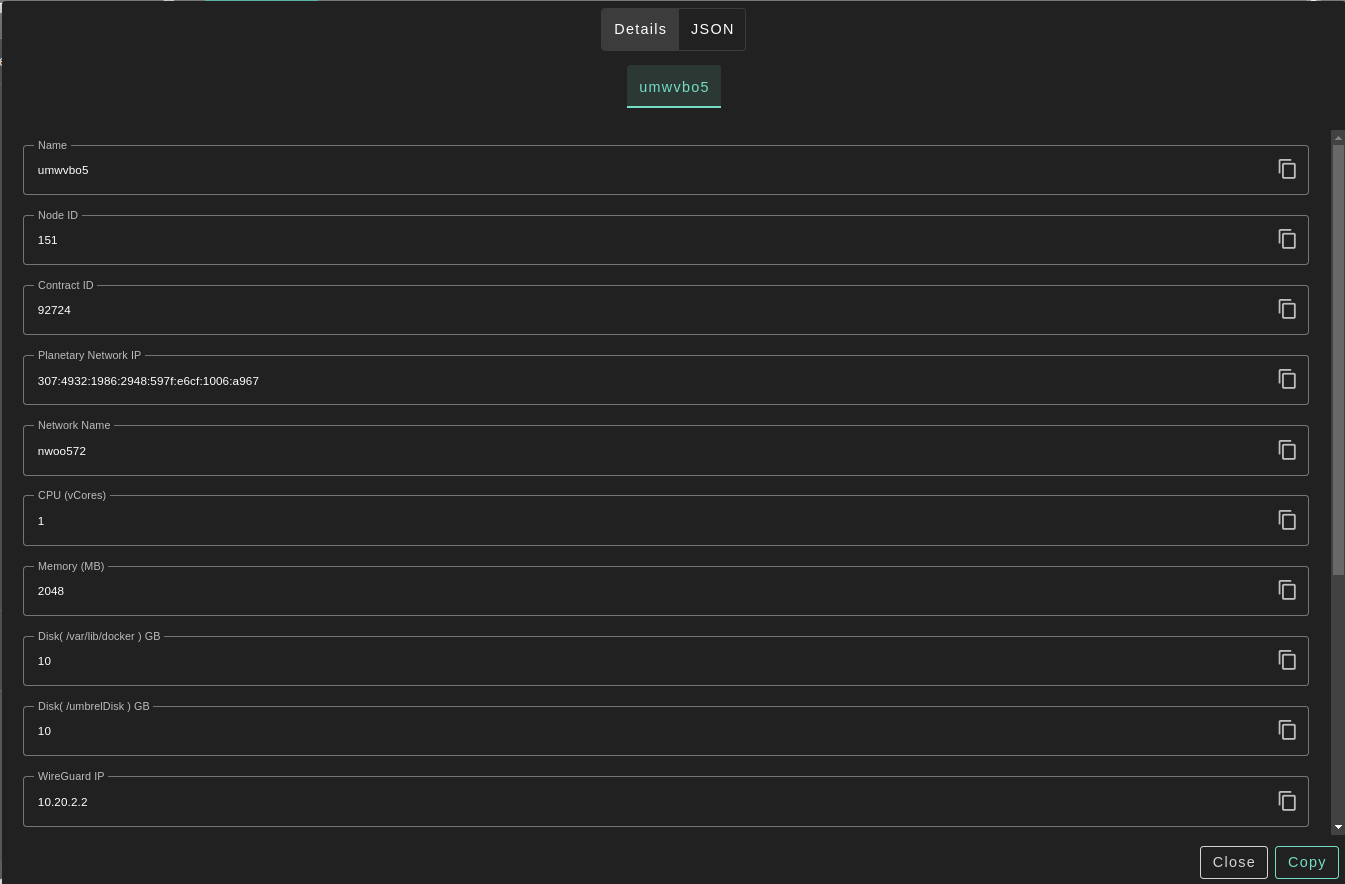
-
For more detailed information, you can switch to
JSONtab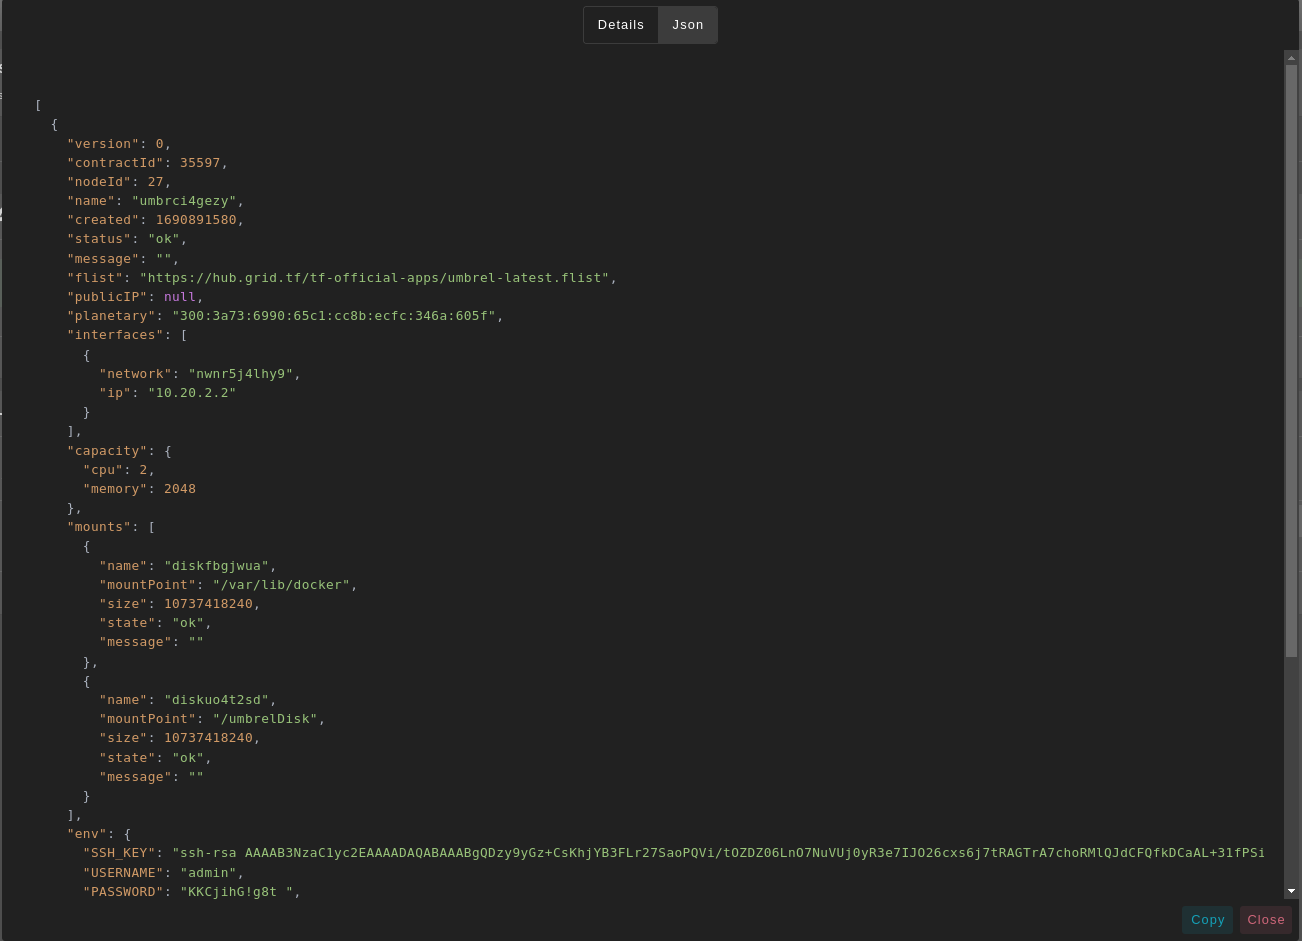
-
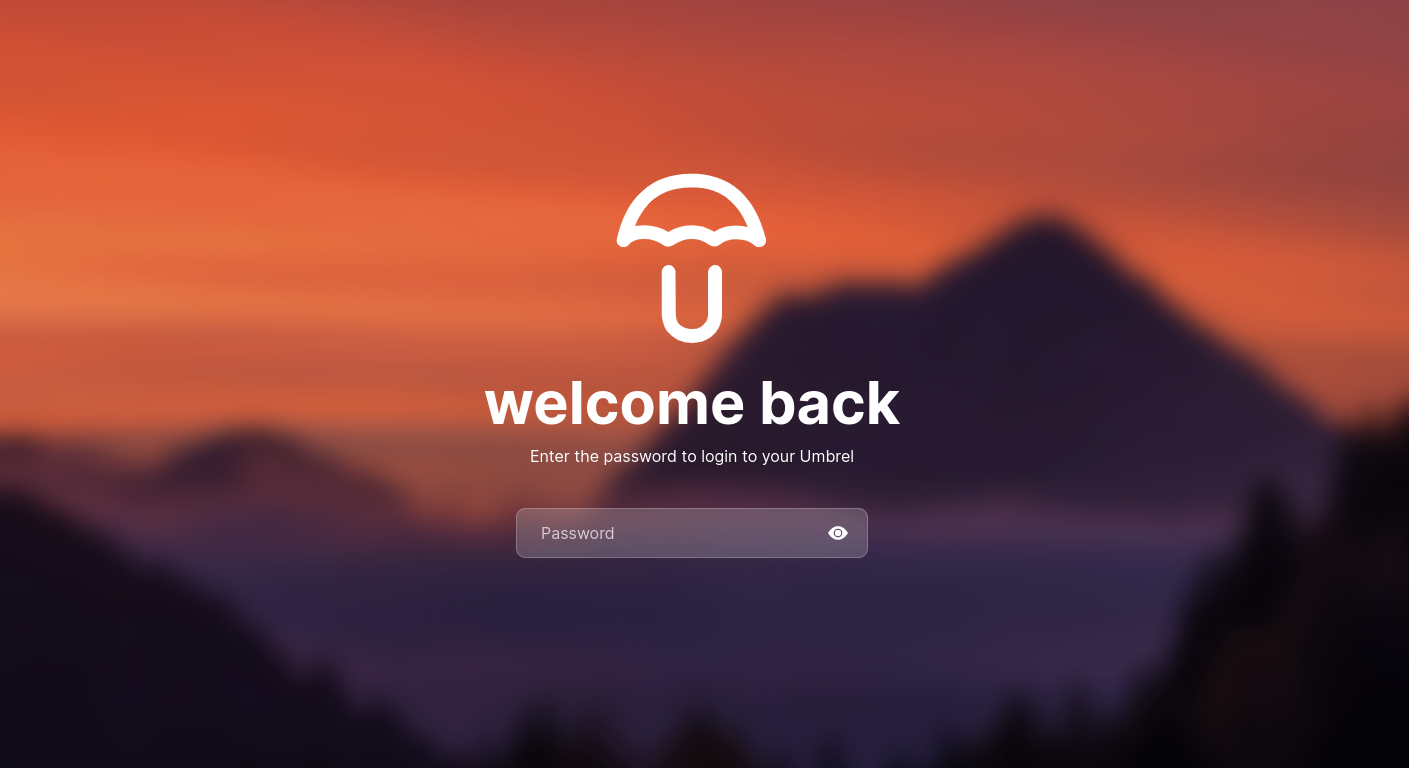
Click on Admin Panel to go to the dashboard of your Umbrel instance!
- Enter the Password that you provided in
configsection to login into Umbrel dashboard.
Forget the credentials? You can find them with
Show detailsbutton. - Enter the Password that you provided in
Warning: Due to the nature of the grid, shutdown, or restart your umbrel from the dashboard MAY make some unwanted behaviors.